getting started with a raspberry pi and node.js
Hardware hacking always sounds really fun, but I found it quite difficult to get into.
I already had an arduino sat doing very little, I was then given a raspberry pi as a gift.
These are a great credit-card sized computer, that can run many programming languages. (A lot of people use python).
Example of things you’ll need to get started;
My PI came pre-installed with NOOBS.
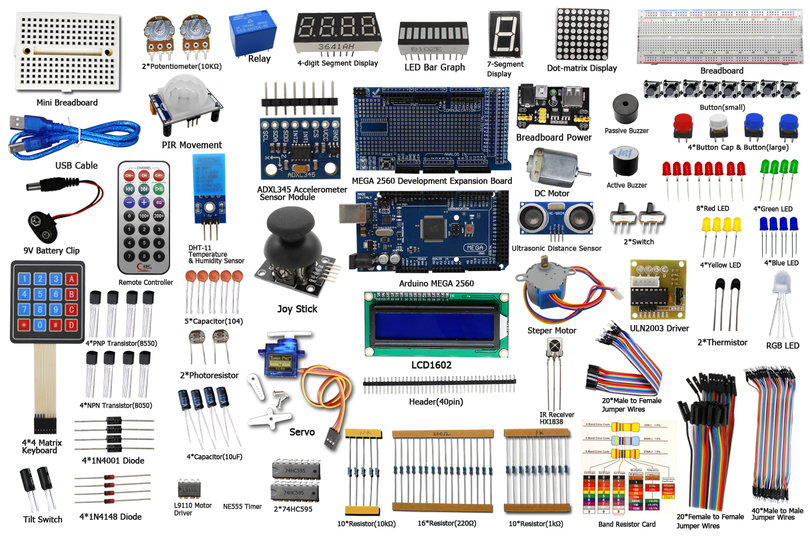
Another option once you have a PI is to buy a kit, I purchased an Adeept - ‘starter kit’ which you can see below.

This has quite a few extra components, but seemed to be a good starting point. They also have an excellent git repo if you like python.
GPIO Pins
This stands for “General-purpose input/output”. Pins allow you to do things like send power to components and read the state of inputs (buttons etc).

The above is from PINOUT! The comprehensive GPIO Pinout guide for the Raspberry Pi. This is a great interactive guide to pins on a Raspberry PI. This will give you a better description of what each pin can do.
Circuits
This is my biggest pain point, with an LED circuit it has 4 wires, with some of the later circuits it has been upwards of 30!
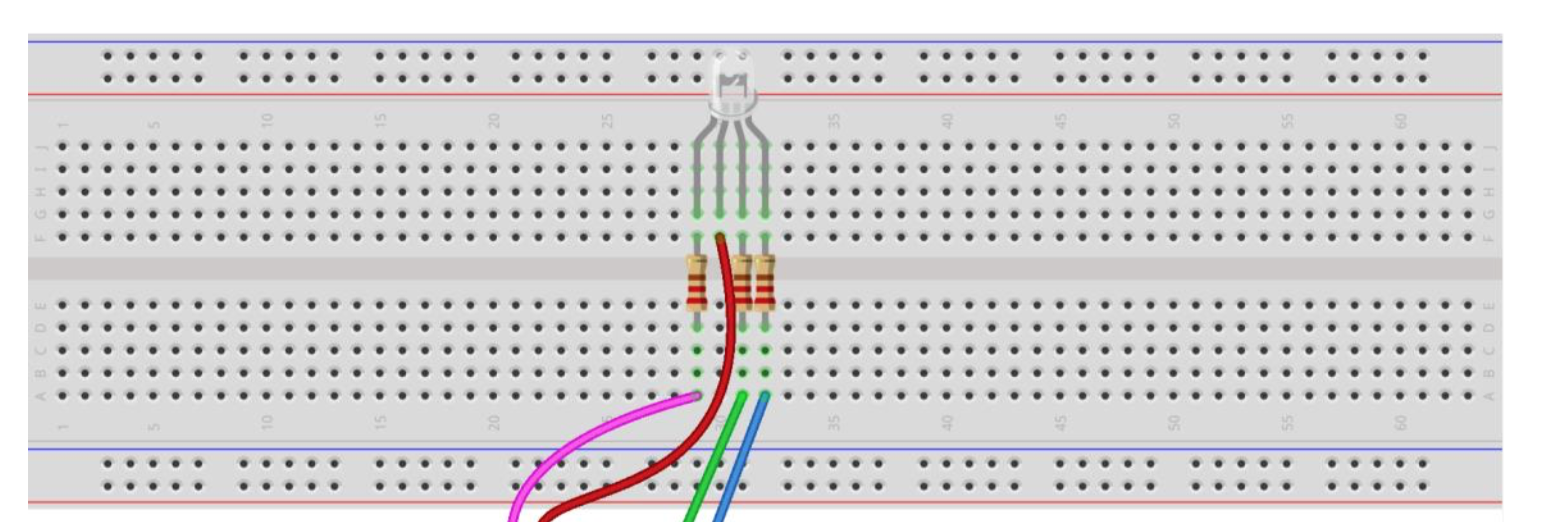
Below is an example of an RGB LED circuit with 3 resistors.

An RGB led has 4 legs, the power long is the longest the others are:
- RED (light)
- POWER
- GREEN (light)
- BLUE (blue)
This needs attaching to the PI pins as follows:
- Pink wire (red leg) to pin 11
- Red wire (power leg) to pin 1
- Green wire to pin 12 (green leg)
- Blue wire to pin 13 (blue leg)
Each of the colour legs must have a resistor between the wire and the RGB leg - I hope the diagram above helps with this!
Scripting
This example requires node.js to be installed and rpio this can be installed via npm.
If you’ve not used npm before after installing it, make a new folder and do npm init then npm install rpio —save.
const rpio = require('rpio');// set pinsconst pins = {'R': 11, 'G': 12, 'B': 13};// set default colour - use COLOUR=(R|G|B) node index to changeconst colour = process.env.COLOUR || 'R';const pin = pins[colour];
// print out color and pinconsole.log('using colour ', colour, ' on pin ', pins[colour]);
// open all pins and set to offObject.keys(pins).forEach(function(pinValue) {  rpio.open(pins[pinValue], rpio.OUTPUT, rpio.HIGH);})
// for 5 loops turn on colour and then turn offfor (var i = 0; i < 5; i++) {        rpio.write(pin, rpio.LOW);        console.log(colour, ' - on ');        rpio.msleep(1500);
        rpio.write(pin, rpio.HIGH);        console.log(colour, ' - off');        rpio.msleep(1500);}
You can run this code in the command line COLOUR=G node index, this will loop over the on/off of the LED as a green colour.
This gives you a starting point for running node.js projects on a raspberry PI.
One of the other projects that is quite interesting Johnny-five, but I’m yet to get it working with my PI.